
JDBC (Java DataBase Connectivity) defines interfaces and classes for database connections. The java.sql package contains classes and interfaces of the JDBC interface.
But why do we need DataBase connectivity in our applications?
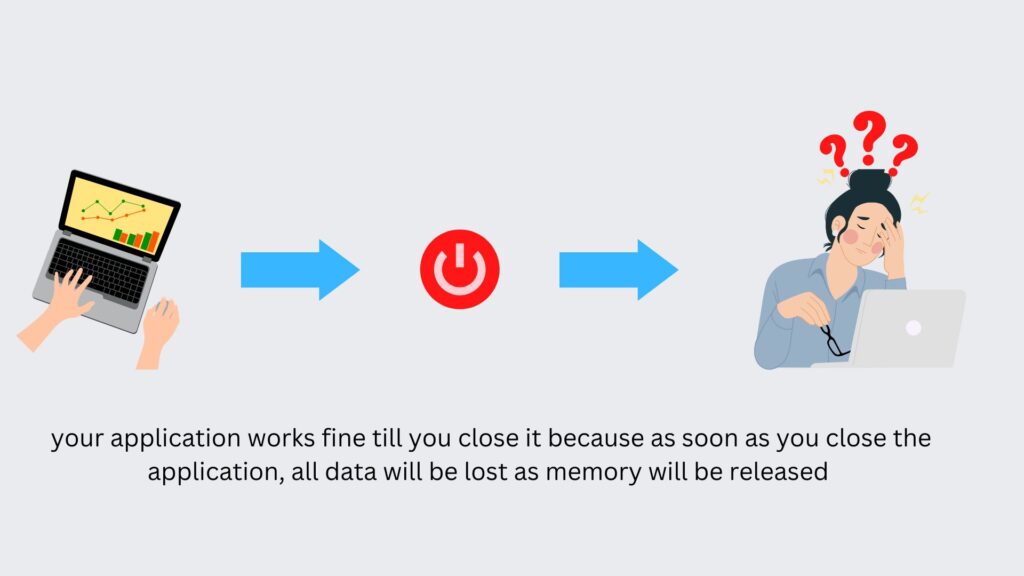
Suppose you need to create an application to manage the billing of a shop. Your application runs fine throughout the day, but at the end of the day, the shopkeeper shuts down the laptop (and hence the application) and goes home.
What do you think will happen when he comes to the shop the next day and starts the application??
All the previous day’s data will be lost as the application was closed and the memory it held was released. But this is catastrophic for the shop (your client).
So what is the solution??
One solution would be to never close the application. But do you think that is a practical solution??
Think about it…suppose there was a way you could connect your application to the database and store data in the database permanently and the next day, you could retrieve all data from the database and use it in your application as if the application was never closed.
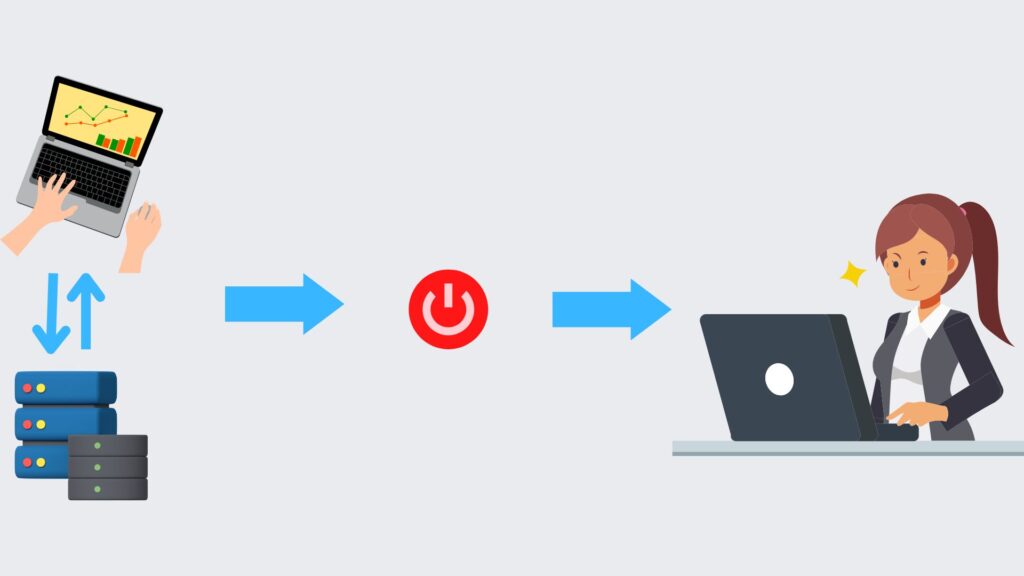
JDBC helps you to connect the database with your Java application.
Let’s see how…
JDBC Architecture
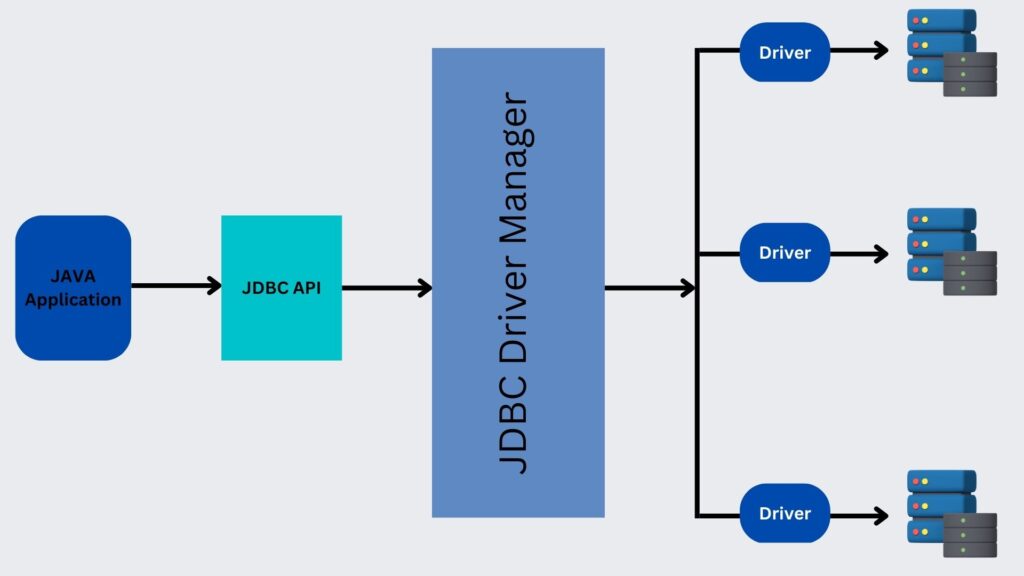
Now let’s learn about each component of JDBC architecture.
JDBC API: allows Java programs to execute SQL statements and retrieve results.
JDBC Driver Manager: manages database-specific drivers to effectively connect applications to databases.
JDBC Drivers: convert requests from the application to a format that databases can understand.
Now that we have learned about the JDBC architecture, let’s see how to write JDBC code.
Writing code for JDBC has the following 5 steps:
- Loading Driver
- Establishing Connection
- Preparing and Executing Statement
- Getting Results
- Closing Database Connection
Now, before we start with the JDBC code it is to be remembered that there should exist a target database and table.
For the following examples, we will use the below MySQL database and table.
create database justanotherjavaguy;
use justanotherjavaguy;
create table my_table(
	sno int,
    name varchar(100)
);
Loading Driver
Before loading the driver in your code it is important to have the driver downloaded in some path on your system. Search maven repository in your browser and in that search for mysql-connector-java (for MySQL driver, similarly you can download for any other database of your requirement) and download the jar file of one of the latest versions.
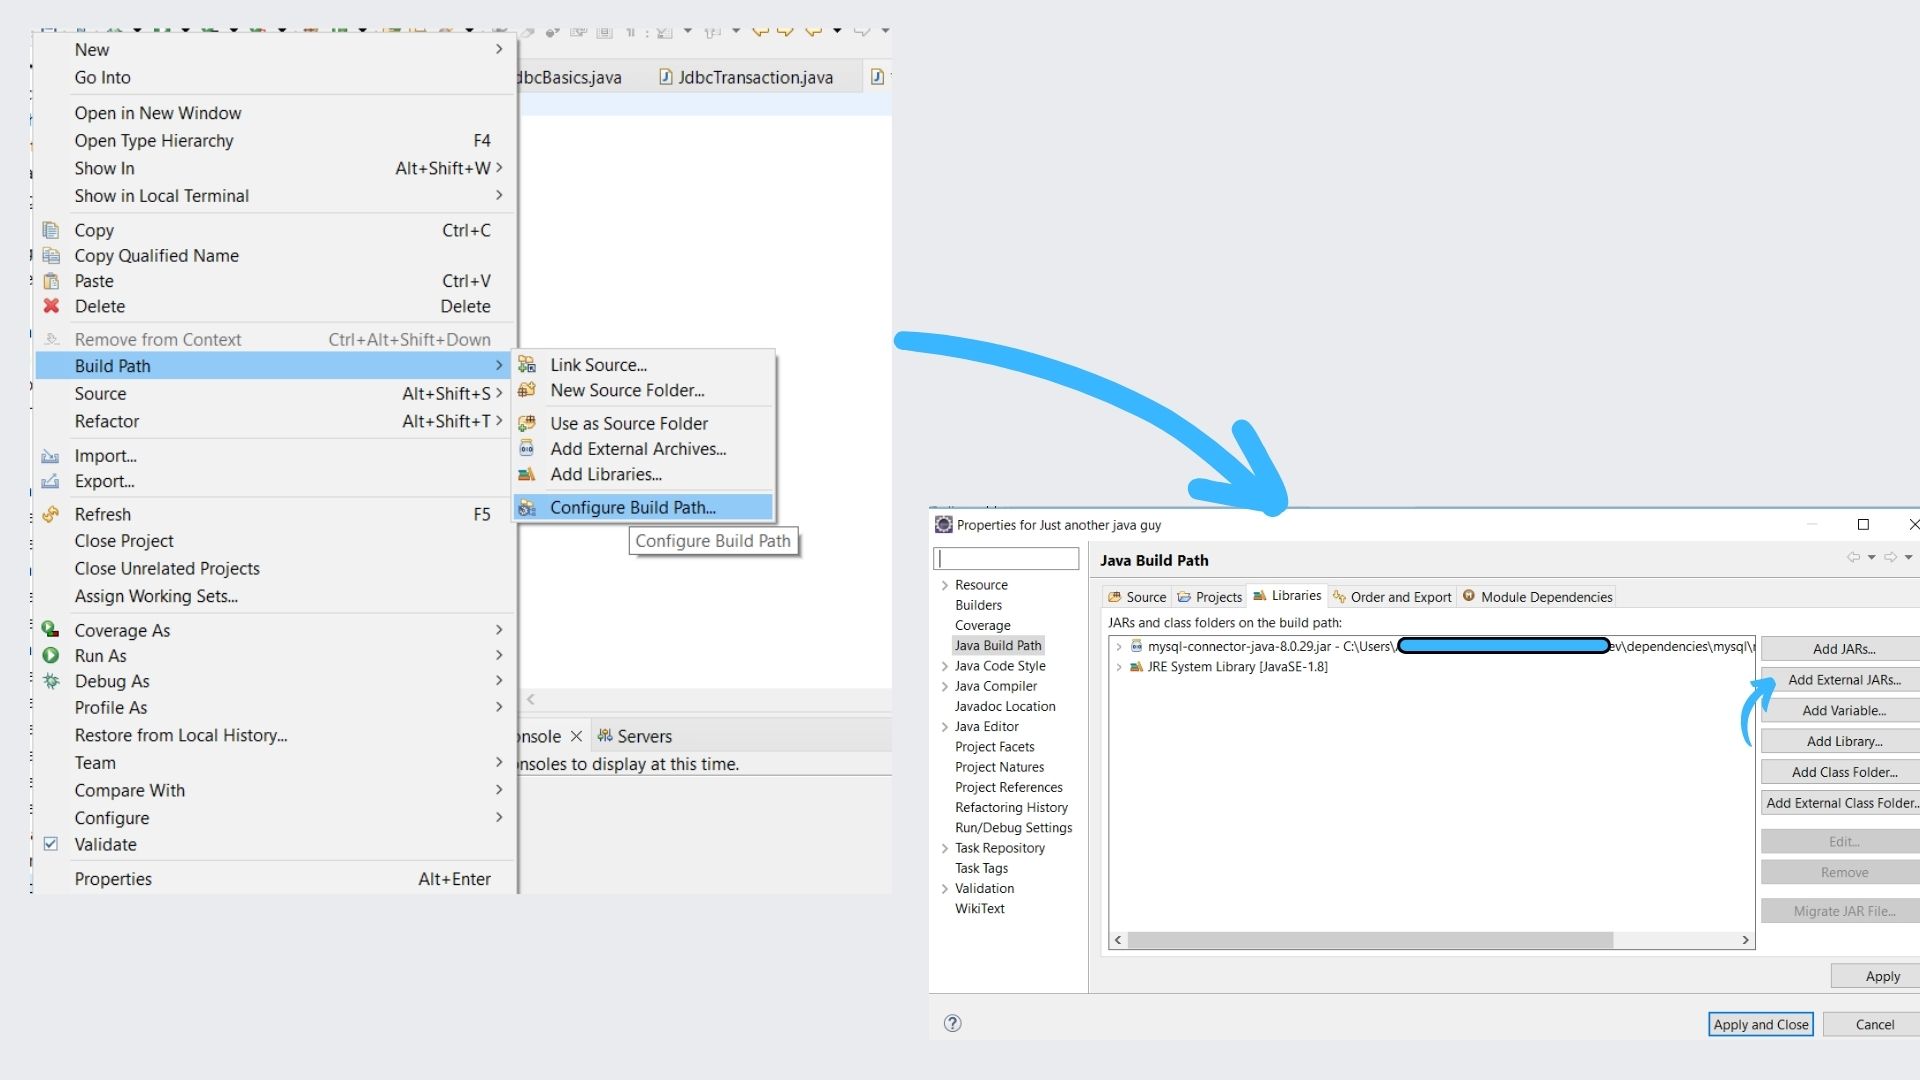
Now you need to add this external jar.
If you are using eclipse editor to write code,
- right click on your Java project
- select Build Path ->then click on Configure Build Path
- Click on library -> Add External Jars and select the jar file from the path in which you downloaded the mysql-connector-java jar file.
Now you can explicitly load the JDBC driver using class.forName("com.mysql.cj.jdbc.Driver")
Let’s see this in action.
package jdbc;

import java.sql.Connection;
import java.sql.DriverManager;
import java.sql.PreparedStatement;
import java.sql.ResultSet;
import java.sql.SQLException;
import java.sql.Statement;

public class JdbcBasics {

	public static void main(String[] args) throws ClassNotFoundException, SQLException {


		Class.forName("com.mysql.cj.jdbc.Driver");//Loading driver
		System.out.println("driver loaded successsfully...");
		}
	}
Establishing Connection
Connection with the database is established using DriverManager.getConnection(url,username,password)
- URL is the database URL, for MySQL :
jdbc:mysql://localhost:3306/datadase_name- if the database is present in the same system then you can use localhost else use the IP address of the database server in place of localhost
- 3306 represents the database port
- username represents a username for the database that has read/write access
- password represents the password for the given username
Let’s see this in action:
package jdbc;

import java.sql.Connection;
import java.sql.DriverManager;
import java.sql.PreparedStatement;
import java.sql.ResultSet;
import java.sql.SQLException;
import java.sql.Statement;

public class JdbcBasics {

	public static void main(String[] args) throws ClassNotFoundException, SQLException {

		String url="jdbc:mysql://localhost:3306/justanotherjavaguy",userName="root",password="root";
		Class.forName("com.mysql.cj.jdbc.Driver");
		System.out.println("driver loaded successsfully...");
		Connection conn=DriverManager.getConnection(url, userName, password);//establishing connection
		System.out.println("connection established successsfully...");
		}
	}
Preparing and Executing Statement
The connection interface has 3 kinds of statements:
- Create Statement
- Prepared Statement
- Callable Statement
- Create Statement: useful for creating static SQL statements.
syntax:Statement stmt=conn.createStatement();
Once the Statement object is created, there are 3 ways to execute it:
- execute(String SQL)
- executeUpdate(String SQL)
- executeQuery(String SQL)
- Prepared Statement: “?” is used in place of parameters in the SQL queries so that the parameters can later be passed dynamically.
syntax:PreparedStatement ps=conn.prepareStatement(sql_as_string);
Once the Statement object is created, there are 3 ways to execute it:- execute()
- executeUpdate()
- executeQuery()
- Callable Statement: useful for executing SQL stored procedure.
syntax:CallableStatement cs = conn.prepareCall("{call procedure_name(?, ?}");
Once the Statement object is created, we can execute using
- execute()
Let’s see this in action:
package jdbc;

import java.sql.Connection;
import java.sql.DriverManager;
import java.sql.PreparedStatement;
import java.sql.ResultSet;
import java.sql.SQLException;
import java.sql.Statement;

public class JdbcBasics {

	public static void main(String[] args) throws ClassNotFoundException, SQLException {

		String url="jdbc:mysql://localhost:3306/justanotherjavaguy",userName="root",password="root";
		Class.forName("com.mysql.cj.jdbc.Driver");
		System.out.println("driver loaded successsfully...");
		Connection conn=DriverManager.getConnection(url, userName, password);
		System.out.println("connection established successsfully...");
		Statement stmt=conn.createStatement();//Create Statement Example
		stmt.execute("insert into my_table values(1,'justanotherjavaguy')");//executing create statement
		String []arr= {"John","Lucy","Kim"};
		String sql="insert into my_table values(?,?)";
		PreparedStatement ps=conn.prepareStatement(sql);//prepared statement example
		int sno=2;
		for(String str:arr) {
			ps.setInt(1, sno);
			ps.setNString(2,str);
			ps.execute();//executing prepared statement
			sno++;
		}
	}
}
Getting Results
ResultSet Object can be obtained as a result of executeQuery() method of Prepared Statement or Create Statement.
If not null, ResultSet object can be iterated over to get results.
Let’s see this in action.
package jdbc;

import java.sql.Connection;
import java.sql.DriverManager;
import java.sql.PreparedStatement;
import java.sql.ResultSet;
import java.sql.SQLException;
import java.sql.Statement;

public class JdbcBasics {

	public static void main(String[] args) throws ClassNotFoundException, SQLException {

		String url="jdbc:mysql://localhost:3306/justanotherjavaguy",userName="root",password="root";
		Class.forName("com.mysql.cj.jdbc.Driver");
		System.out.println("driver loaded successsfully...");
		Connection conn=DriverManager.getConnection(url, userName, password);
		System.out.println("connection established successsfully...");
		Statement stmt=conn.createStatement();//create statement example
		stmt.execute("insert into my_table values(1,'justanotherjavaguy')");
		String []arr= {"John","Lucy","Kim"};
		String sql="insert into my_table values(?,?)";
		PreparedStatement ps=conn.prepareStatement(sql);//prepared statement example
		int sno=2;
		for(String str:arr) {
			ps.setInt(1, sno);
			ps.setNString(2,str);
			ps.execute();
			sno++;
		}
		ResultSet rs=conn.createStatement().executeQuery("select * from my_table");//ResutSet Example
		int sno1;
		String name1;
		System.out.println("The rows entered are:");
		while(rs.next())//iterating over ResultSet object
		{
			sno1=rs.getInt("sno");
			name1=rs.getString("name");
			System.out.println(sno1+" "+name1);
		}
	}
}
Closing Database Connection
In order to close the database connection, we use the close() method of Connection object.
package jdbc;

import java.sql.Connection;
import java.sql.DriverManager;
import java.sql.PreparedStatement;
import java.sql.ResultSet;
import java.sql.SQLException;
import java.sql.Statement;

public class JdbcBasics {

	public static void main(String[] args) throws ClassNotFoundException, SQLException {

		String url="jdbc:mysql://localhost:3306/justanotherjavaguy",userName="root",password="root";
		Class.forName("com.mysql.cj.jdbc.Driver");
		System.out.println("driver loaded successsfully...");
		Connection conn=DriverManager.getConnection(url, userName, password);
		System.out.println("connection established successsfully...");
		Statement stmt=conn.createStatement();
		stmt.execute("insert into my_table values(1,'justanotherjavaguy')");
		String []arr= {"John","Lucy","Kim"};
		String sql="insert into my_table values(?,?)";
		PreparedStatement ps=conn.prepareStatement(sql);
		int sno=2;
		for(String str:arr) {
			ps.setInt(1, sno);
			ps.setNString(2,str);
			ps.execute();
			sno++;
		}
		ResultSet rs=conn.createStatement().executeQuery("select * from my_table");
		int sno1;
		String name1;
		System.out.println("The rows entered are:");
		while(rs.next())
		{
			sno1=rs.getInt("sno");
			name1=rs.getString("name");
			System.out.println(sno1+" "+name1);
		}
		conn.close();//closing database connection
		System.out.println("Connection closed");
	}

}
Output
driver loaded successsfully...
connection established successsfully...
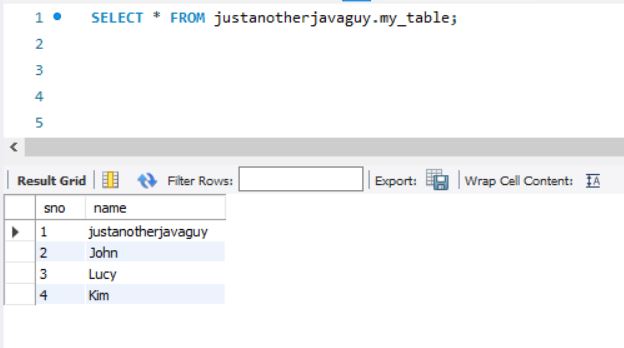
The rows entered are:
1 justanotherjavaguy
2 John
3 Lucy
4 Kim
Connection closed
Java output
Transaction Management
In Java DataBase Connectivity (JDBC), transactions are by-default auto committed. For transaction management first, we need to set auto commit to false.
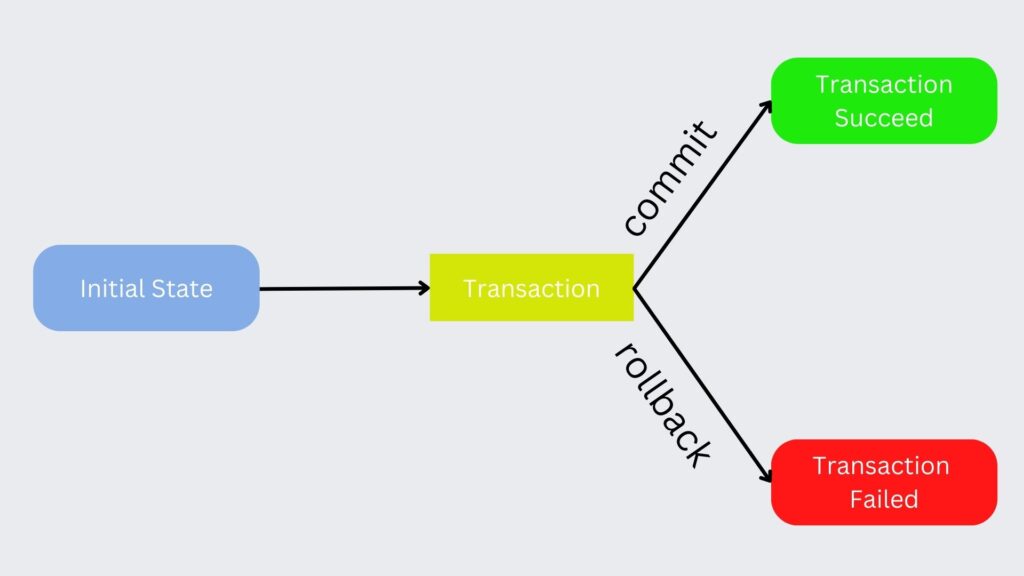
Connection Interface provides the below methods for transaction management.
- setAutoCommit()
- commit()
- rollback()
- setSavepoint()
Let’s see an example to understand how transaction management works:
package jdbc;
import java.sql.Connection;
import java.sql.DriverManager;
import java.sql.SQLException;
import java.sql.Savepoint;
import java.sql.Statement;
public class JdbcTransaction {
public static void main(String[] args) throws ClassNotFoundException, SQLException {
Savepoint sp1=null;
String url="jdbc:mysql://localhost:3306/justanotherjavaguy",userName="root",password="root";
Class.forName("com.mysql.cj.jdbc.Driver");
Connection conn=DriverManager.getConnection(url, userName, password);
try {
Statement stmt=conn.createStatement();
conn.setAutoCommit(false);//setting auto commit to false
sp1=conn.setSavepoint("savepoint1");//first savepoint
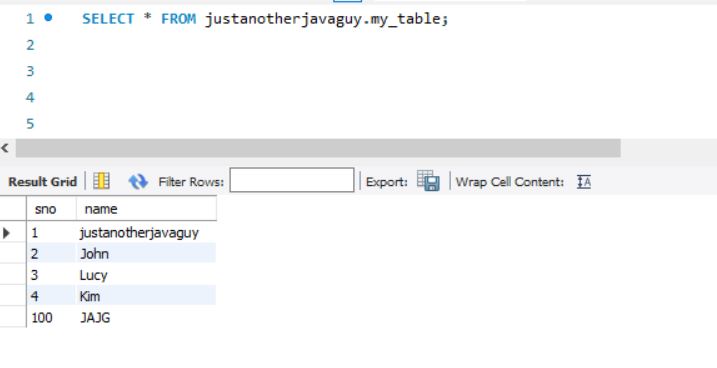
String sql="insert into my_table values(100,'JAJG')";
stmt.executeUpdate(sql);
System.out.println("insert");
sp1=conn.setSavepoint("savepoint2");//second savepoint
sql="inserted into my_table values(101,'JAJG')";//wrong sql code, so it should go to catch block on executing update
stmt.executeUpdate(sql);
System.out.println("inserted");
conn.commit();//committing transaction
}catch(Exception e) {
conn.rollback(sp1);//rolls back to last savepoint sp1 before error
conn.commit();//committing transaction
}
}
}
Output
Wrapping it up…
In this blog, we have discussed Java Database Connectivity.
In the coming blogs, I’ll be discussing more advanced concepts such as Hibernate.
If Java web development interests you and you want to pursue a professional certification for it, you can refer to this course by Udacity.